
自分用メモ。GUIは使いません。
Ubuntu Linux Server 18.04 をインストール
適当にインストールする。今回は32GBメモリを搭載したマシンだったけど、partition設定のところで entire disk 選んで何も指定しなかったら、インストール後に8GBのsparseなswap fileが設定されてることに気付いて、今時はそのほうが何かと便利かもなあと思った。
VMの稼働に必要なソフトウェアと設定
ブリッジネットワークの設定(netplan)
bridge で使うので設定する。Ubuntu 18.04は netplan という仕組みでネットワークを設定するのがデフォルトになっている。
今回は10GbEのネットワークだったのでMTUを設定したかったのだが、なんかMTUを設定するのにMAC addressを指定しないといけないという謎仕様(バグ?)があるらしい→ https://bugs.launchpad.net/netplan/+bug/1724895
$ sudo apt install bridge-utils
$ cat /etc/netplan/50-cloud-init.yaml
# This file is generated from information provided by
# the datasource.  Changes to it will not persist across an instance.
# To disable cloud-init's network configuration capabilities, write a file
# /etc/cloud/cloud.cfg.d/99-disable-network-config.cfg with the following:
# network: {config: disabled}
network:
  ethernets:
    enp1s0f0:
      match:
        macaddress: ff:ff:ff:ff:ff:ff
      dhcp4: no
      dhcp6: no
      mtu: 9000
  bridges:
    br0:
      interfaces: [enp1s0f0]
      addresses:
        - 192.168.1.200/24
      gateway4: 192.168.1.1
      nameservers:
        addresses:
        - 192.168.1.2
        - 192.168.1.3
        search:
        - example.com
  version: 2
libvirt関連ツール
$ sudo apt install libvirt-daemon-system libvirt-clients bridge-utils libvirt-bin virtinst
$ sudo adduser username libvirt-qemu

## virt-install --os-variant で指定できる値がわかる
$ sudo apt install libosinfo-bin
$ osinfo-query os
ゲストOS(Windows Server 2016 Standard)をインストールする
必要なISOイメージを入手しておく
Windows Server 2016のISOイメージはどっかから入手する。
VirtIOを使いたいので、Windows Guest Driversを入手しておく。親切にもISOイメージが用意されているのでこれを使うと簡単。

virt-install でゲスト設定を作る
$ virt-install --name win01 --ram 24576 -v --os-variant=win2k16 --vcpus 8 --disk path=/path/to/disk.img,bus=virtio --cdrom=/path/to/SW_DVD9_Win_Server_STD_CORE_2016_64Bit_Japanese_-4_DC_STD_MLF_X21-70533.ISO --cdrom=/path/to/virtio-win.iso --graphics vnc,listen=0.0.0.0これだけだとvirtio-win.isoしかCD-ROMドライブが設定されてなくてインストーラを起動できなかったので、手動で設定を追加する。
<disk type='file' device='cdrom'>要素をコピーして適当にやる。
    <disk type='file' device='cdrom'>
      <driver name='qemu' type='raw'/>
      <source file='/path/to/SW_DVD9_Win_Server_STD_CORE_2016_64Bit_Japanese_-4_DC_STD_MLF_X21-70533.ISO'/>
      <target dev='hda' bus='ide'/>
      <readonly/>
      <address type='drive' controller='0' bus='0' target='0' unit='0'/>
    </disk>
    <disk type='file' device='cdrom'>
      <driver name='qemu' type='raw'/>
      <source file='/path/to/virtio-win.iso'/>
      <target dev='hdb' bus='ide'/>
      <readonly/>
      <address type='drive' controller='0' bus='0' target='0' unit='1'/>
    </disk>
ゲストVMを起動してVNC接続する
$ virsh start win01起動したらホストマシンのIPアドレスに対してVNC接続すればゲストVMの画面に接続できる。便利ですね。
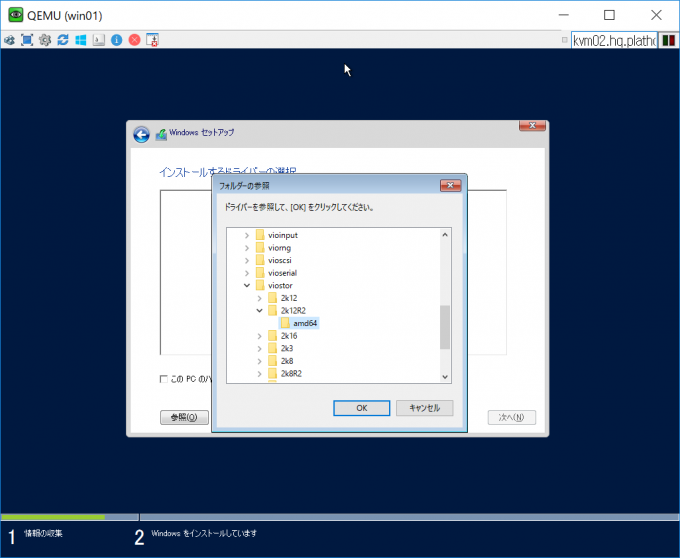
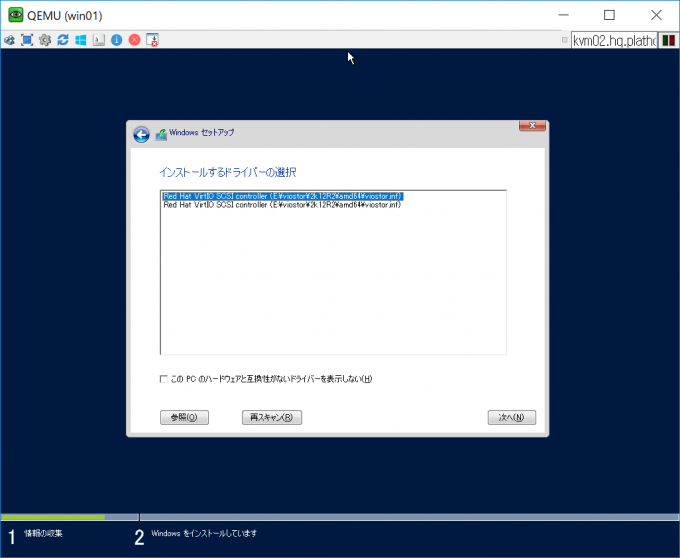
Windows Serverのインストーラでvirtioドライバを読み込む
virt-win.iso がCD-ROMドライブとして認識されているので、指定するだけ。やらないとストレージを認識できなくてインストールできない。
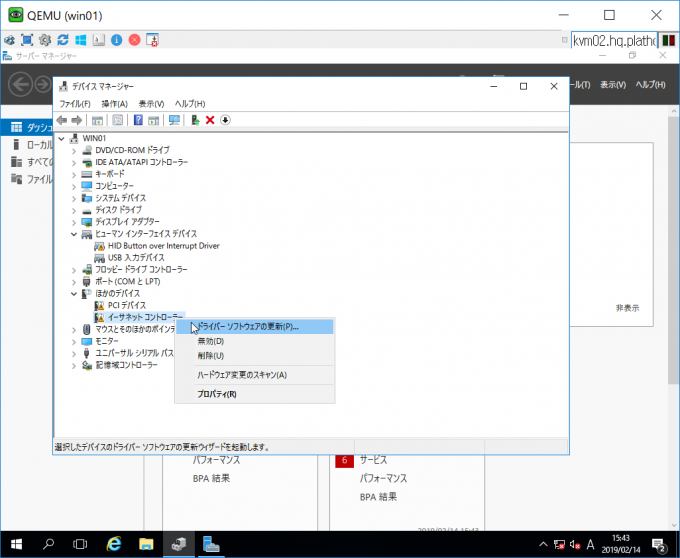
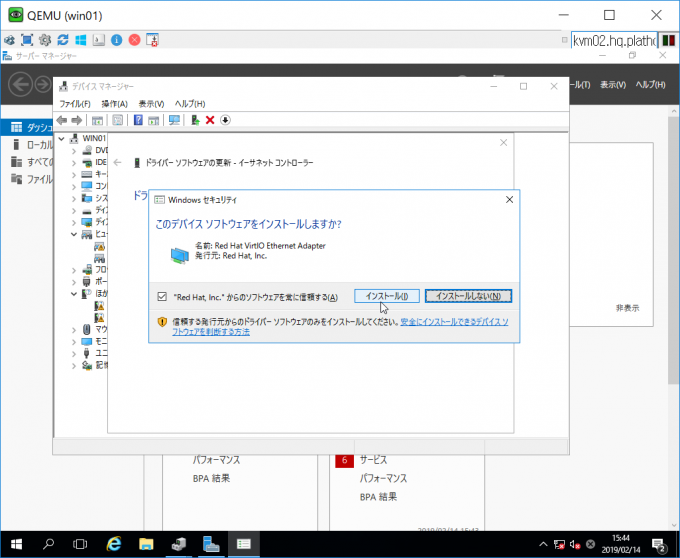
ネットワークもvirtio化する
インストールする前にやっておいても良いかも。
<model type='virtio'> として起動し直すだけ。再起動だと変更が有効にならない。
$ virsh edit win01 <interface type='bridge'>
<mac address='52:54:00:ff:ff:ff'/>
<source bridge='br0'/>
- <model type='rtl8139'/>
+ <model type='virtio'/>
<address type='pci' domain='0x0000' bus='0x00' slot='0x03' function='0x0'/>
</interface>あとはデバイスマネージャーからドライバをインストールしてやるだけ。簡単。
あとがき
今までリモートデスクトップでWindowsをガンガン使うことはなかったけど、そこそこハイスペックなWindows PCがリモートデスクトップで使用できるようになってるとなにかと便利かも知れないなあと思った。